How to manage Payment Gateway on KS Pay
KS Pay, a powerful payment orchestration platform, simplifies the process of integrating and managing multiple payment gateways for merchants. By leveraging KS Pay, businesses can save time and money while efficiently handling payment gateway integrations, downtime management, and smart routing. This allows merchants to focus on their core business operations while KS Pay takes care of their payment gateway needs.
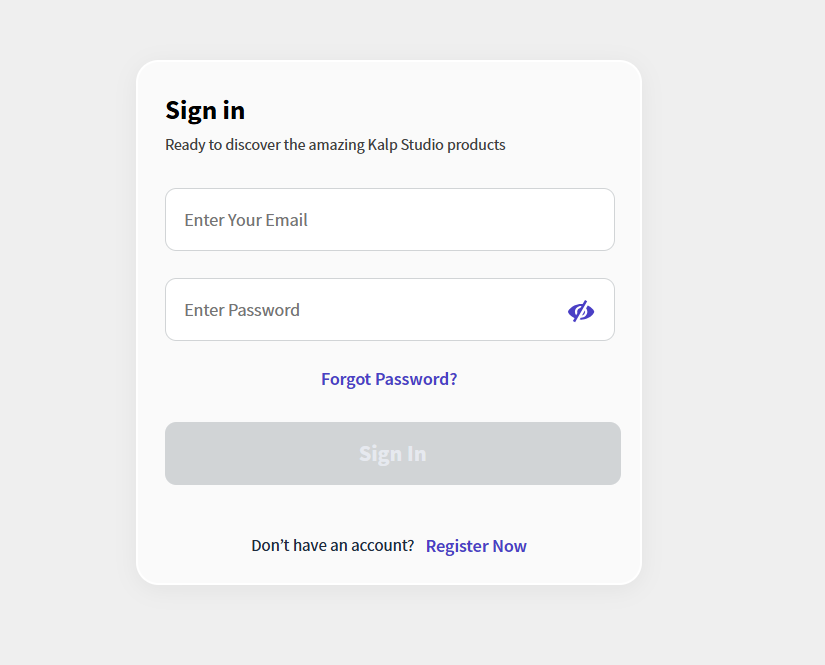
Step 1: Log In to your Kalp Studio Account

-
Navigate to the Kalp Studio sign-in page: Enter the URL for the Kalp Studio login page
-
Enter your email address: Locate the "Enter Your Email" field on the sign-in form and enter your registered email address.
-
Enter your password: Find the "Enter Password" field and type in your Kalp Studio account password.
-
Click "Sign In": Once you have entered your credentials, click the "Sign In" button to access your Kalp Studio account.
Step 2: Navigating to the Applications Section
-
Locate the Sidebar Menu: Once logged in, you will see a navigation menu on the left side of the screen.
-
Click "Applications": Find the "Applications" icon in the sidebar menu and click on it. This will take you to the Applications section.
-
View Your Services: In the Applications section, you can see a list of services, products and apps you subscribed to.

Step 3: Access KS Pay
- Click on “Explore KS Pay”

For the new users, it is mandatory to add company details and register your application on KS Pay.
Refer the following articles:
The KS Pay Dashboard will appear.

Step 4: Navigate to the App List
On the main dashboard, locate the list of registered apps. Each app has a unique ID, name, associated email, and country details.

Step 5: Select Your App
Identify the app for which you want to add a domain. Click on the app name to access its details.

Step 6: Open the App Overview
You will be directed to the App Overview page. This page provides details about transactions associated with your app, including the total number of transactions and today’s transactions. If no transactions have been recorded yet, this section will display “No transaction yet.”

Step 7: Go to Settings
In the sidebar menu on the left, click on Settings. This section allows you to manage various configurations for your app, including API keys and domain settings.

Step 8: Add Payment Gateways
-
On the Payment Gateway Settings page, you'll see a list of existing payment gateways associated with supported currencies.
-
Click on "+ Add Gateway" to include a new gateway.

-
Choose the desired gateway (e.g., Razorpay or Cashfree) and select the supported currency (e.g., INR for Indian Rupees), as shown in the screenshot below:

-
The newly added gateway will appear under the relevant currency section

Step 9: Verify Payment Gateways
To verify a gateway, select the Edit (pencil) icon next to the gateway name. Verified gateways are marked with a green checkmark.

Step 10: Enable or Disable Payment Gateways
-
Use the toggle switch next to each gateway to enable or disable it. Enabled gateways will be active for transactions.

-
For a gateway to be fully operational, it needs to be both enabled and verified.
Step 11: Set Payment Gateway Priority
-
Click on "Set Priority" at the bottom of the Payment Gateway section.
-
In the panel that appears, drag and drop gateways to set their priority.

-
Place your preferred gateway (e.g., Razorpay or Cashfree) at the top of the list.
-
Arrange other gateways below as fallback options.
-
Save your priority settings.
Step 12: Manage Currency and Payment Modes
- Under the Set Priority section, select the specific currency (e.g., INR).

-
Specify the payment modes available for the selected gateway, such as UPI, Net Banking, or Credit/Debit Cards.
-
Rearrange payment modes if needed to prioritize certain options.
Additional Tips
Razorpay Configuration
When configuring Razorpay on KS Pay:
-
Obtain your Razorpay API Key ID and Secret Key from the Razorpay dashboard.
-
Enter these credentials in the designated fields on KS Pay.
-
Set up webhooks to ensure real-time communication between Razorpay and KS Pay for payment status updates.
Cashfree Configuration
For Cashfree integration on KS Pay:
-
Retrieve your Cashfree App ID and Secret Key from the Cashfree dashboard.
-
Input these details into the appropriate fields on KS Pay.
-
Configure the API base URL according to your Cashfree account type (Test or Production).
-
Enable Cashfree-related events for comprehensive payment status tracking.
By following these steps, you can efficiently configure and manage payment gateways like Razorpay or Cashfree on KS Pay. This streamlined process allows you to offer multiple payment options to your customers while benefiting from KS Pay's smart routing and downtime management features. With KS Pay handling the complexities of payment gateway integration, you can focus on growing your business.

